Deploying Your Node.js App
A very quick guide to getting a NodeJS app running in a Google Cloud VM
1. Have code on Github
We developed and tested our code on our laptop and pushed it to github. For this task I am assuming you are using the code from task4.
2. get google instance
- Type in a name for your instance.
- Select the region and zone you prefer. For a free micro instance do not select Northern Virginia
- For machine family select general purpose and series E2.
- for machine type select e2-micro
- Under boot disk select Ubuntu 20.04 LTS
- Finally under Firewall, select Allow HTTP traffic
- Select ‘Create”’
3. Login and install basic software
Click on ssh for your instance …

A terminal window should open:
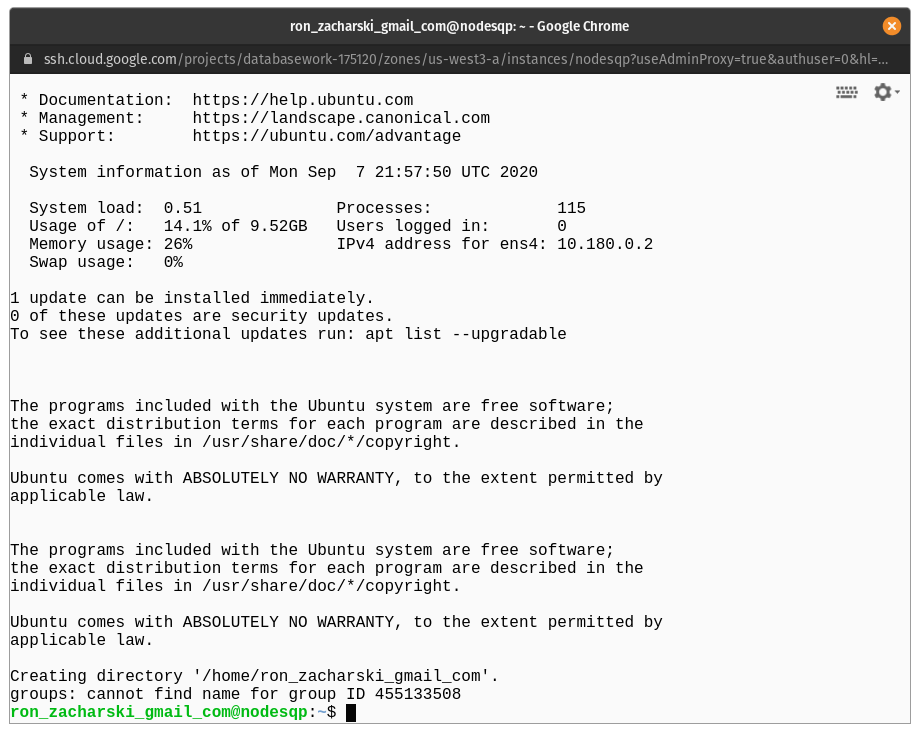 We are going to install some basic software.
NGINX server
NGINX (pronounced engine-x) is a free, open-source web server that can also function as a reverse proxy server. We are going to use it as a reverse proxy server. Installation is straight forward
sudo apt update
sudo apt install nginx
(select ‘Y’ when queried).
Back in your Google Cloud Console, you will see the external IP of your instance
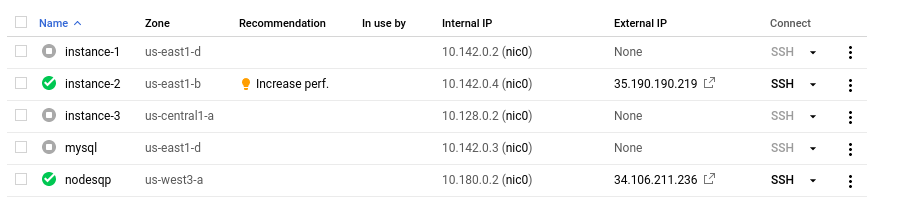
You see that my nodesqp instance has an external ip of 34.106.211.236. In my browser I will type in the url http://34.106.211.236 and I see
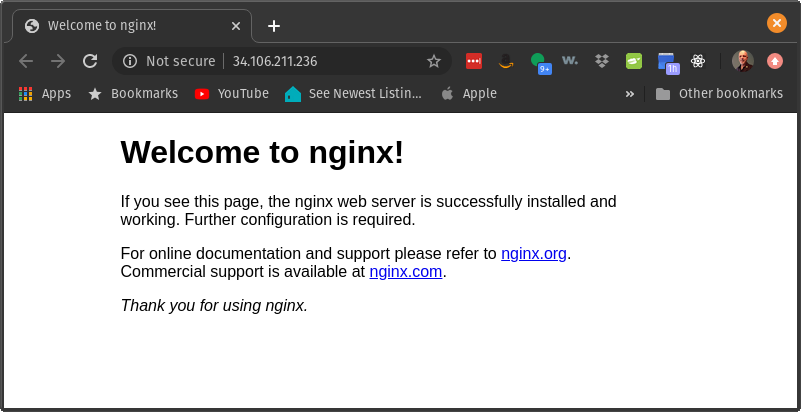
We successfully installed nginx!
PostgreSQL
Let’s install PostgreSQL next:
sudo apt install postgresql postgresql-contrib
Again, type ‘Y’ when prompted.
Set a password for postgres:
ron_zacharski_gmail_com@nodesqp:~$ sudo sudo -u postgres psql
psql (12.4 (Ubuntu 12.4-0ubuntu0.20.04.1))
Type "help" for help.
postgres=# \password
Enter new password:
Enter it again:
postgres=# \q
Now we can log in the usual way:
$ psql -U postgres -h localhost
Password for user postgres:
psql (12.4 (Ubuntu 12.4-0ubuntu0.20.04.1))
SSL connection (protocol: TLSv1.3, cipher: TLS_AES_256_GCM_SHA384, bits: 256, compression: of
f)
Type "help" for help.
postgres=#
The PostgreSQL is a service, meaning it will run all the time in the background. When the machine reboots, services automatically restart. NGINX is also a service. You can see the status of any service. For example, to see the status of NGINX…
$ sudo service nginx status
● nginx.service - A high performance web server and a reverse proxy server
     Loaded: loaded (/lib/systemd/system/nginx.service; enabled; vendor preset: enabled)
     Active: active (running) since Mon 2020-09-07 22:12:34 UTC; 21min ago
       Docs: man:nginx(8)
   Main PID: 3155 (nginx)
      Tasks: 3 (limit: 1166)
     Memory: 5.3M
     CGroup: /system.slice/nginx.service
             ├─3155 nginx: master process /usr/sbin/nginx -g daemon on; master_process on;
             ├─3156 nginx: worker process
             └─3157 nginx: worker process
Sep 07 22:12:34 nodesqp systemd[1]: Starting A high performance web server and a reverse pro>
Sep 07 22:12:34 nodesqp systemd[1]: Started A high performance web server and a reverse prox>
lines 1-14/14 (END)
type q to quit
get our code from github
It is time to get your code from github.
When I was getting mine I used …
git clone https://github.com/zacharski/my_database_code.git
Obviously, your repository has a different url.
Here is the output of that command:
$ git clone https://github.com/zacharski/my_database_code.gi
t
Cloning into 'my_database_code'...
Username for 'https://github.com': zacharski
Password for 'https://zacharski@github.com':
remote: Enumerating objects: 57, done.
remote: Counting objects: 100% (57/57), done.
remote: Compressing objects: 100% (42/42), done.
remote: Total 57 (delta 13), reused 52 (delta 11), pack-reused 0
Unpacking objects: 100% (57/57), 620.35 KiB | 3.04 MiB/s, done.
ron_zacharski_gmail_com@nodesqp:~$
Now let’s change into our directory containing the code for this task and list the contents of it…
$ cd my_database_code/tasks/task4/
ron_zacharski_gmail_com@nodesqp:~/my_database_code/tasks/task4$ ls
package-lock.json  package.json  pics  readme.md  roadTrip.sql  server4.js
ron_zacharski_gmail_com@nodesqp:~/my_database_code/tasks/task4$
Ok. Let’s load in the SQL file into postgresql and do a simple test:
psql -U postgres -h locahost
password for user postgres:
psql (12.4 (Ubuntu 12.4-0ubuntu0.20.04.1))
SSL connection (protocol: TLSv1.3, cipher: TLS_AES_256_GCM_SHA384, bits: 256, compression: of
f)
Type "help" for help.
postgres=# \i roadTrip.sql
SSL connection (protocol: TLSv1.3, cipher: TLS_AES_256_GCM_SHA384, bits: 256, compression: of
f)
You are now connected to database "postgres" as user "postgres".
psql:roadTrip.sql:2: NOTICE:  database "taskfour" does not exist, skipping
DROP DATABASE
CREATE DATABASE
SSL connection (protocol: TLSv1.3, cipher: TLS_AES_256_GCM_SHA384, bits: 256, compression: of
f)
You are now connected to database "taskfour" as user "postgres".
CREATE TABLE
INSERT 0 5
CREATE TABLE
INSERT 0 11
taskfour=# select name, location from campgrounds;
              name               |    location
---------------------------------+----------------
 Three Rivers Petroglyph Site    | Lincoln, NM
 Baca Campground                 | Lincoln, NM
 South Fork Campground           | Nogal, NM
 Valley of Fires Recreation Area | Carrizozo, NM
 Oak Grove Campground            | Alto, NM
 Three Rivers Campground         |
 Silver Campground               | Cloudcroft, NM
 Springtime Campground           | Magdalena, NM
 Bear Trap Campground            | Magdalena, NM
 Datil Well Campground           | Datil, NM
 Apache Creek                    | Reserve, NM
(11 rows)
taskfour=#
Ok. that looks good. Let’s quit Postgres and continue with installing software.
NodeJS
We install NodeJS using NVM. We can get the latest version of NVM by looking at the installation instructions on its website. At the time of this writing that was version 0.35.3:
curl -o- https://raw.githubusercontent.com/nvm-sh/nvm/v0.35.3/install.sh | bash
Then let’s close the terminal. You’ll see the warning
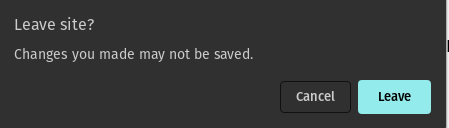
Click ‘leave’
When we reopen the terminal we can see all the different versions of nodejs LTS we can install:
nvm ls-remote --lts
Let’s install the latest LTS (In my case, the latest I see is 12.18.3)
nvm install 12.18.3
and test that it is installed:
$ node -v
v12.18.3
Now, we can install the node modules we need. in our task4 directory we execute:
npm install
Security
create a .env file with the correct login information. Make sure your login is not the root postgres user and has minimal permissions.
If you forgot how to do that, within psql …
taskfour=# CREATE USER campy;
CREATE ROLE
taskfour=# \password campy
Enter new password:
Enter it again:
taskfour=# GRANT SELECT, INSERT ON attractions TO campy;
GRANT
taskfour=# GRANT SELECT, INSERT ON campgrounds TO campy;
GRANT
taskfour=# GRANT USAGE, SELECT ON SEQUENCE attractions_id_seq TO campy;
GRANT
taskfour=# GRANT USAGE, SELECT ON SEQUENCE campgrounds_id_seq TO campy;
GRANT
taskfour=#
The .env would look something like
DB_HOST=localhost
DB_USER=campy
DB_PASS=enc49ytrz89z
Your vim skills might be handy for creating this file!
Now let’s start the server
node server4.js
If we are successful we should see:
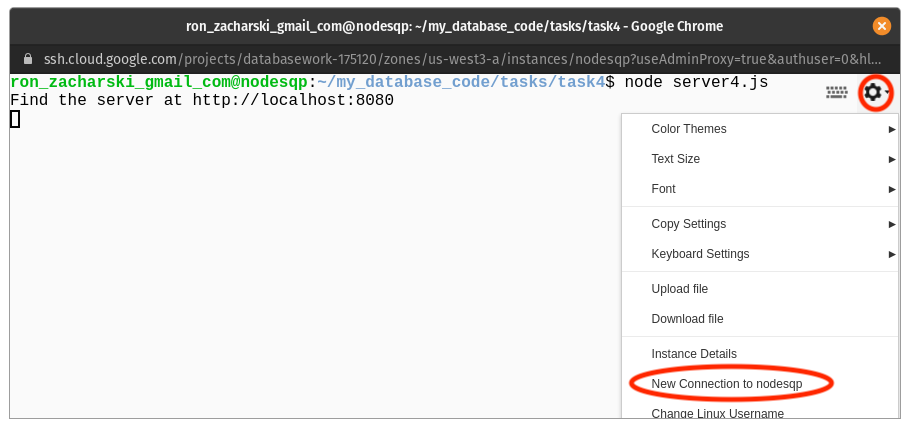
Find the server at http://localhost:8080
Now we are going to open a new terminal window. On the upper right of your current terminal you will see a gear icon. Click on that and select New Connection to …
Another terminal window will open up.
In that window type the command:
curl http://localhost:8080/searchAttractions?town=Magdalena,%20NM
you should see the result:
{"result":["Very Large Array","Kelly Ghost Town"]}
Congratulations! This is a great way to check that your code is at least somewhat working before adding other potential sources of failure.
We are now about halfway through getting your code working on Google Cloud.
You may want to take a break, stretch, go for a walk with your dog before we tackle going back to NGINX to make it a reverse proxy server….
NGINX as a reverse proxy
When we started our server we saw:
Find the server at http://localhost:8080
So our server is running locally on port 8080. We would like our code to be accessible to anyone in the world who has a browser and an Internet connect.
We saw that anyone can access our machine by going to the external ip:
Now our task is to connect the two.
For this we are going to change the file /etc/nginx/sites-available/default to:
server {
        listen 80 default_server;
        listen [::]:80 default_server;
        root /var/www/html;

        index index.html index.htm index.nginx-debian.html;
        server_name _;


        location / {
        proxy_pass http://localhost:8080;
        proxy_http_version 1.1;
        proxy_set_header Upgrade $http_upgrade;
        proxy_set_header Connection 'upgrade';
        proxy_set_header Host $host;
        proxy_cache_bypass $http_upgrade;
    }
}
There are two ways to do this.
Way 1. edit the file directly
You can edit the existing file in vim:
sudo vim /etc/nginx/sites-availabe/default
Way 2. create the file on your laptop and then upload
I think this way is easier because I am fluent on my laptop editor but not so fluent in vim. once I create the file I can upload it from the terminal menu on the top right:
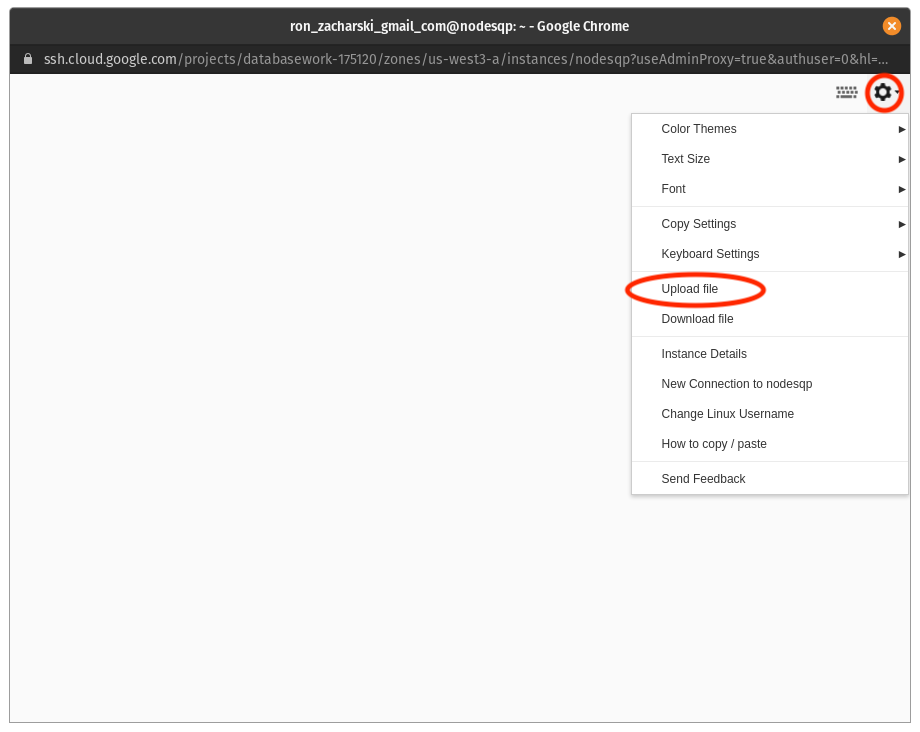
The file gets uploaded to your root directory and you will need to move it to the correct directory:
cd
sudo mv default /etc/nginx/sites-available/default
If you don’t want to type, the file is also available in the task4.5 directory of our github repo.
Regardless of whether you used way 1 or way 2, you can check the syntax of the
sudo nginx -t
If everything is fine you should see:
nginx: the configuration file /etc/nginx/nginx.conf syntax is ok
nginx: configuration file /etc/nginx/nginx.conf test is successful
Now it is time to restart NGINX to load in the new default file:
sudo systemctl restart nginx
If successful you should see nothing!
Test the reverse proxy server.
Now a check to see if the reverse proxy server is working correctly. This is sort of a hold-your-breath moment.
Again in your task4 folder start your server:
node server4.js
And again you should see
Find the server at http://localhost:8080
When we were testing our server with curl we used the command
curl http://localhost:8080/searchAttractions?town=Magdalena,%20NM
We are going to replace the localhost:8080 with our external IP address and paste that URL string in our browser:
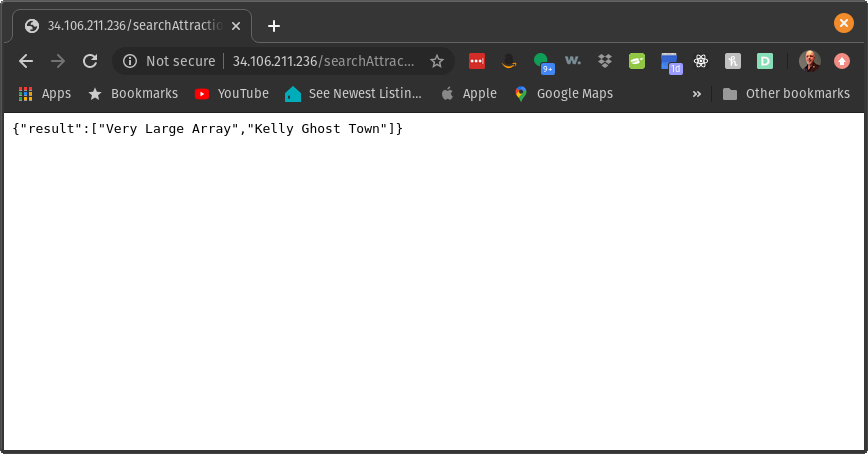
Cool. Now anyone in the world can use our app!
Unfortunately, as soon as we log out our server stops and no one can use it:
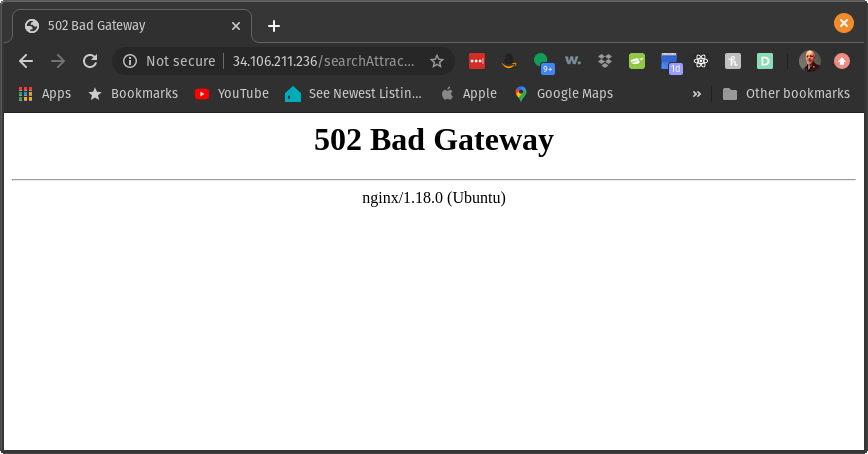
Next we are going to fix that by installing pm2 which will enable our server to run regardless of whether we are logged in our not. It is the final piece of the puzzle.
PM2
PM2 is a process manager for nodeJS applications. We install it globally (using the -g option) with
npm install -g pm2
Don’t laugh, but I will say that pm2 is simple and easy to use. Honest.
Start an application
To start an application in pm2 we use pm2 start so to start our task4.js server we type
pm2 start server4.js
When we do that we should see output ending in something like:
[PM2] Done.
┌────┬────────────────────┬──────────┬──────┬───────────┬──────────┬──────────┐
│ id │ name               │ mode     │ ↺    │ status    │ cpu      │ memory   │
├────┼────────────────────┼──────────┼──────┼───────────┼──────────┼──────────┤
│ 0  │ server4            │ fork     │ 0    │ online    │ 0%       │ 28.8mb   │
└────┴────────────────────┴──────────┴──────┴───────────┴──────────┴──────────┘
so your server4 is running in the background. If you log out of your Google VM it will stay running. pm2 adds server4 to its process list. The name it gives the process is the name of your file minus the .js so we see in the display above that the name is server4 and it also creates a pm2 id. In the example above the id is 0. The status column refers to whether your code is online , or possibly threw an error.
There is one additional thing we can do to make your server survive a reboot.
pm2 startup systemd
This will display a command you need to execute as root. Mine looked like:
sudo env PATH=$PATH:/home/ron_zacharski_gmail_com/.nvm/versions/node/v12.18.3/bin /home/ron_zacharski_gmail_com/.nvm/versions/node/v12.18.3/lib/node_modules/pm2/bin/pm2 startup systemd -u ron_zacharski_gmail_com --hp /home/ron_zacharski_gmail_com
This will create a systemd unit (a resource systemd knows how to handle) which runs pm2 when the system boots. pm2 in turn starts your server4 process. We can check the status of this unit with
systemctl status pm2
basic commands
In addition to pm2 start the following will be useful
pm2 status
will display all the active processes running under pm2. This is useful to see if your code stopped for some reason.
pm2 info server4
This provides an amazing amount of information including the location of the error logs.
pm2 stop server4
Obviously stops the process named server4
pm2 restart server4
Useful when you made a change to the code and want to restart your server.
The next project
This should be enough to get you finished with workshop. Let’s say you have done that, I looked at it and gave you credit and now you want to get workshop version 2 running. You just stop the first workshop code:
pm2 stop workshop
Then test your workshop version 2 code using curl and other methods. Finally you start it with
pm2 start workshopV2.js
or whatever you named it.