Experiment 12:
An OLED LCD display
Point Summary
- Basics 10xp
- Alleviating End of Semester Stress 10-20xp
- Liberal Arts - 5xp
- Be Be Happy - 15-25xp
- Temperature and Humidity - 20xp
- Sunny Cloudy - 15xp
- Magic 8 Ball 20xp
- Magic 8 Text 15xp
- Too Hot Text - 20xp
Since the start of class we’ve been working with LEDs. LED stands for Light Emitting Diode. In this experiment we are going to work with an OLED display. OLED stands for Organic Light Emitting Diode.
 Unless otherwise noted all images are under the Attribution-ShareAlike Creative Commons license by Adafruit.
The hard part - Wiring the circuit
The hardest part of this lab might be getting the wiring correct. Be very careful and check your work. Here is the diagram (the resistor should be 330 ohm):

The Basic Code
Installing the library.
First you need to download the library at Download Adafruit_FeatherOLED from github. Unzip the file you download and move the resulting folder to your Arduino/libraries folder.
The basic code 10xp
Here is the code:
// include the library code:
#include <LiquidCrystal.h>
// example by Tom Igoe
// initialize the library by associating any needed LCD interface pin
// with the arduino pin number it is connected to
int rs = 12, en = 11, d4 = 5, d5 = 4, d6 = 3, d7 = 2;
LiquidCrystal lcd(rs, en, d4, d5, d6, d7);

void setup() {
  // set up the LCD's number of columns and rows:
  lcd.begin(16, 2);
  // Print a message to the LCD.
  lcd.print("hello, world!");
}

void loop() {
  // set the cursor to column 0, line 1
  // (note: line 1 is the second row, since counting begins with 0):
  lcd.setCursor(0, 1);
  // print the number of seconds since reset:
  lcd.print(millis() / 1000);
}
Let’s dissect that code
#include <LiquidCrystal.h>
loads the LiquidCrystal library and we’ve seen #include before.
int rs = 12, en = 11, d4 = 5, d5 = 4, d6 = 3, d7 = 2;
We haven’t seen this syntax before. Normally we have been declaring variables like this:
int led1 = 5;
int led2 = 6;
int led3 = 7;
If we are declaring a number of integer variables we can do so all on one line:
int led1 = 5, led2 = 6, led3 = 7;
So
int rs = 12, en = 11, d4 = 5, d5 = 4, d6 = 3, d7 = 2;
just sets variables that link the pins on the LCD to pins on the Arduino. We use this in the next line:
LiquidCrystal lcd(rs, en, d4, d5, d6, d7);
which initializes the LCD and gives it the name lcd.
In the setup procedure we specify how many columns and rows the LCD has. In our case 16 columns and two rows. Next we print the string hello, world! to the LCD.
  lcd.begin(16, 2);
  // Print a message to the LCD.
  lcd.print("hello, world!");
In the loop we encounter:
lcd.setCursor(0, 1);
The first number represents the column. So column 0 is the first column. The second represents the row—1 representing the second row. So after we print hello, world! we move to the next line.
millis() is a built in procedure that returns the number of milliseconds that have passed since we started the program. So
lcd.print(millis() / 1000);
will print the number of seconds since the program started, and, since it is in the loop, it keeps incrementing.
Remix 1 - B B B Be Be Happy
Can you make this Be Happy display?
Hints
The LiquidCrystal library has a procedure clear() that will clear the display. For example
lcd.clear()
My solution had an array …
String msg[] = {"", "B", "Be", "Be ", "Be H", "Be Ha", "Be Hap", ...};
and a few for loops.
Remix 2: Temp and Humidity
Even though the LCD has an amazing amount of connections to our Arduino Uno, there are still some pins left on the Arduino and we can add other components.
ing those buttons we can use those pins for other things.
Temperature sensor.
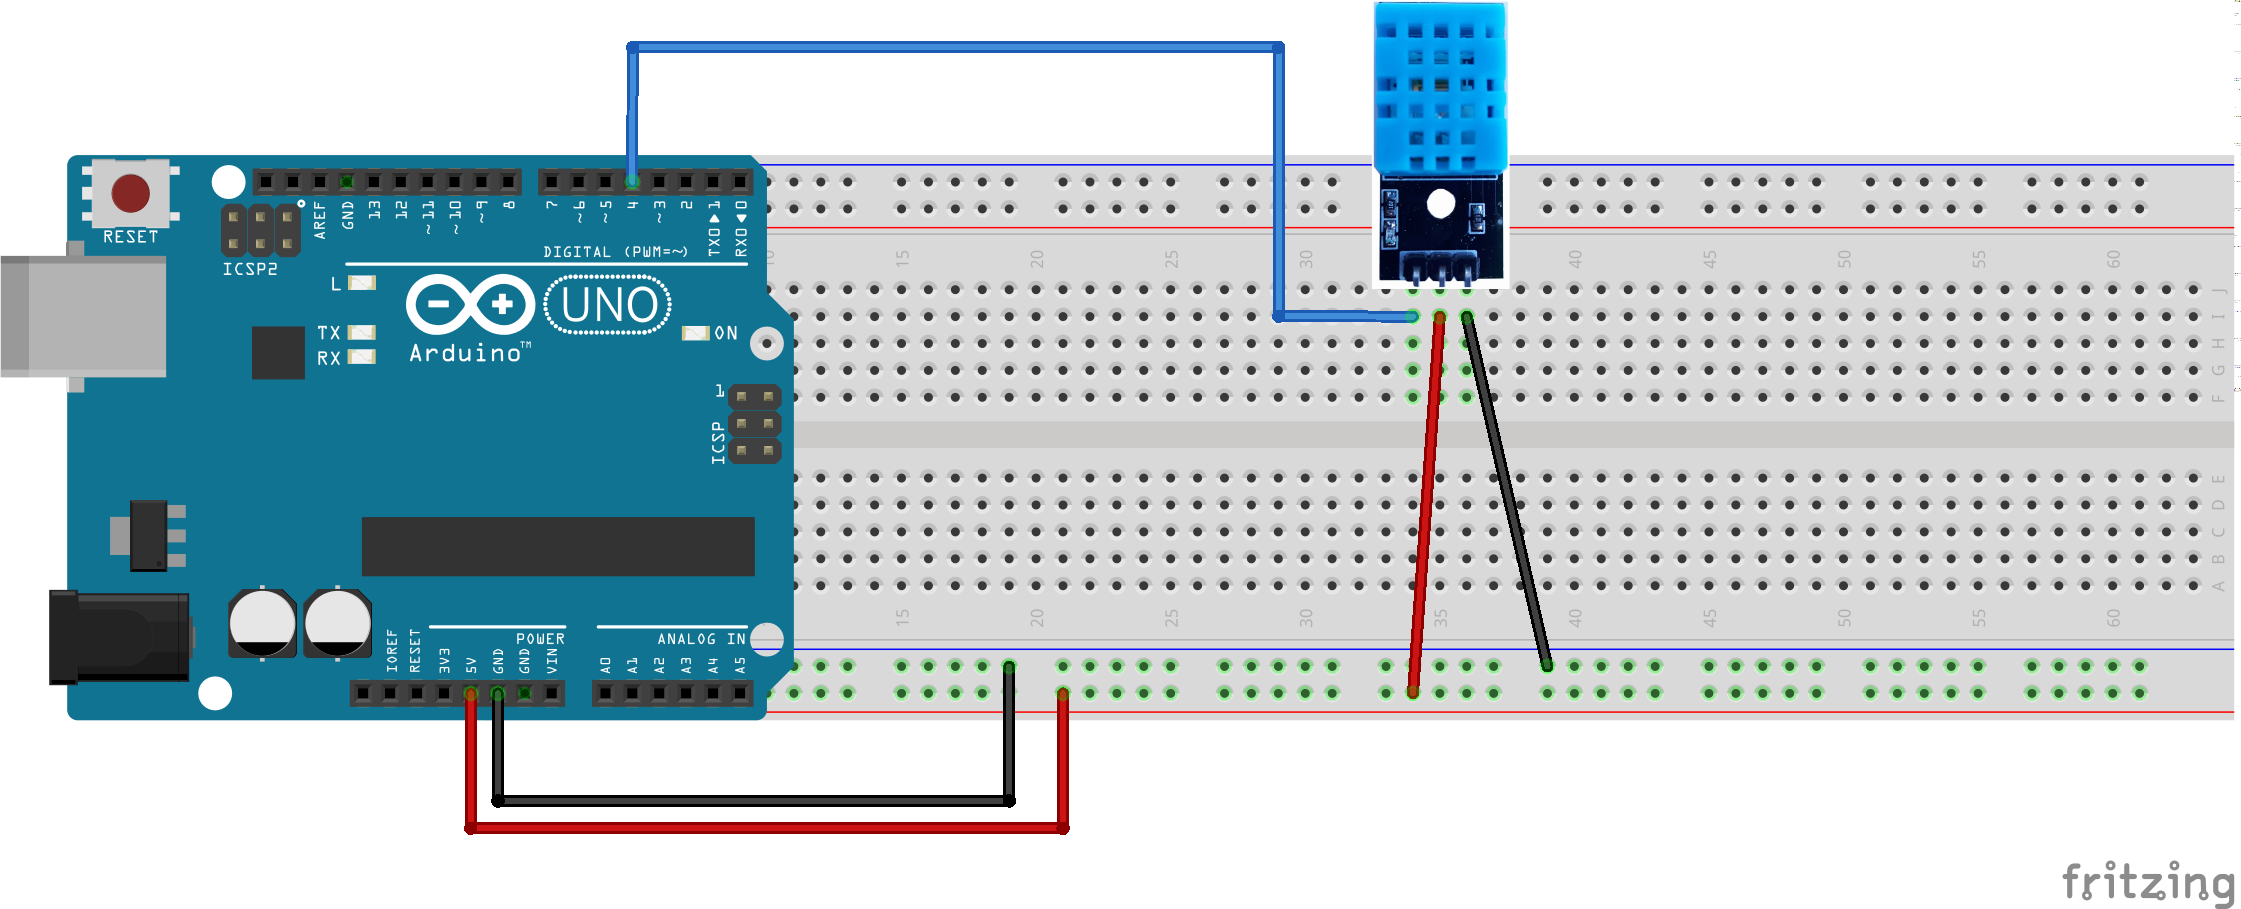
Let’s keep the LCD connected+ but temporarily switch to the temperature/humidity sensor included in the kit.
It is wired up this way (again, no need to remove the OLED):
The Temperature Sensor library
In the Arduino IDE under the sketch menu select Include Library and then Manage Libraries…. Search for DHT and select the item DHT sensor library from the list,
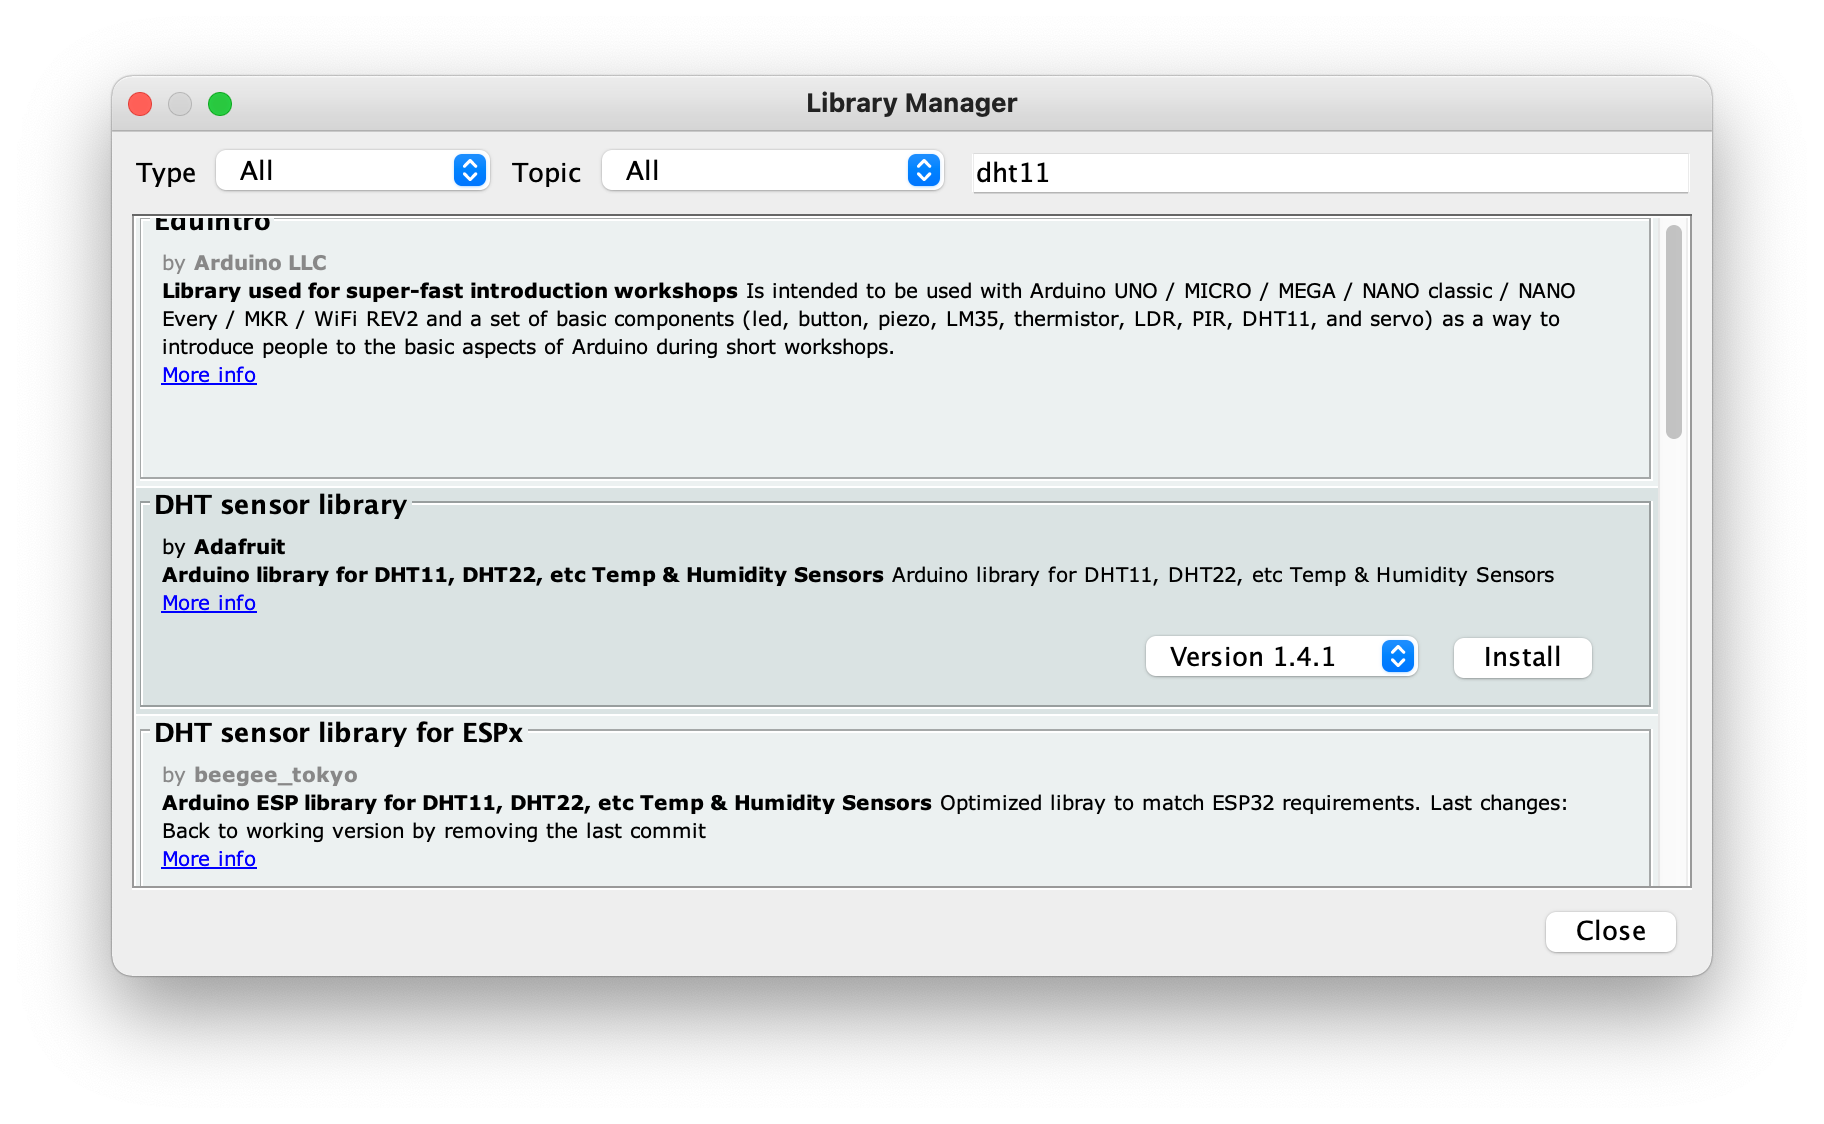
then click on install and when prompted select install all.
The code
#include "DHT.h"

int dhtpin = 4;


DHT dht(dhtpin, DHT11);

void setup() {
  Serial.begin(9600);
  Serial.println("Starting sensor ...");

  dht.begin();
}

void loop() {
  // Wait a few seconds between measurements.
  delay(2000);

  // Reading temperature or humidity takes about 250 milliseconds!
  // Sensor readings may also be up to 2 seconds 'old' (its a very slow sensor)
  float h = dht.readHumidity();
  // Read temperature as Celsius (the default)
  float t = dht.readTemperature();
  // Read temperature as Fahrenheit (isFahrenheit = true)
  float f = dht.readTemperature(true);

  if (isnan(h) || isnan(t) || isnan(f)) {
    Serial.println(F("Failed to read from DHT sensor!"));
    return;
  }

  // Compute heat index in Fahrenheit (the default)
  float hif = dht.computeHeatIndex(f, h);
  // Compute heat index in Celsius (isFahreheit = false)
  float hic = dht.computeHeatIndex(t, h, false);

  Serial.print(F("Humidity: "));
  Serial.print(h);
  Serial.print(F("%  Temperature: "));
  Serial.print(t);
  Serial.print(F("°C "));
  Serial.print(f);
  Serial.print(F("°F  Heat index: "));
  Serial.print(hic);
  Serial.print(F("°C "));
  Serial.print(hif);
  Serial.println(F("°F"));
}
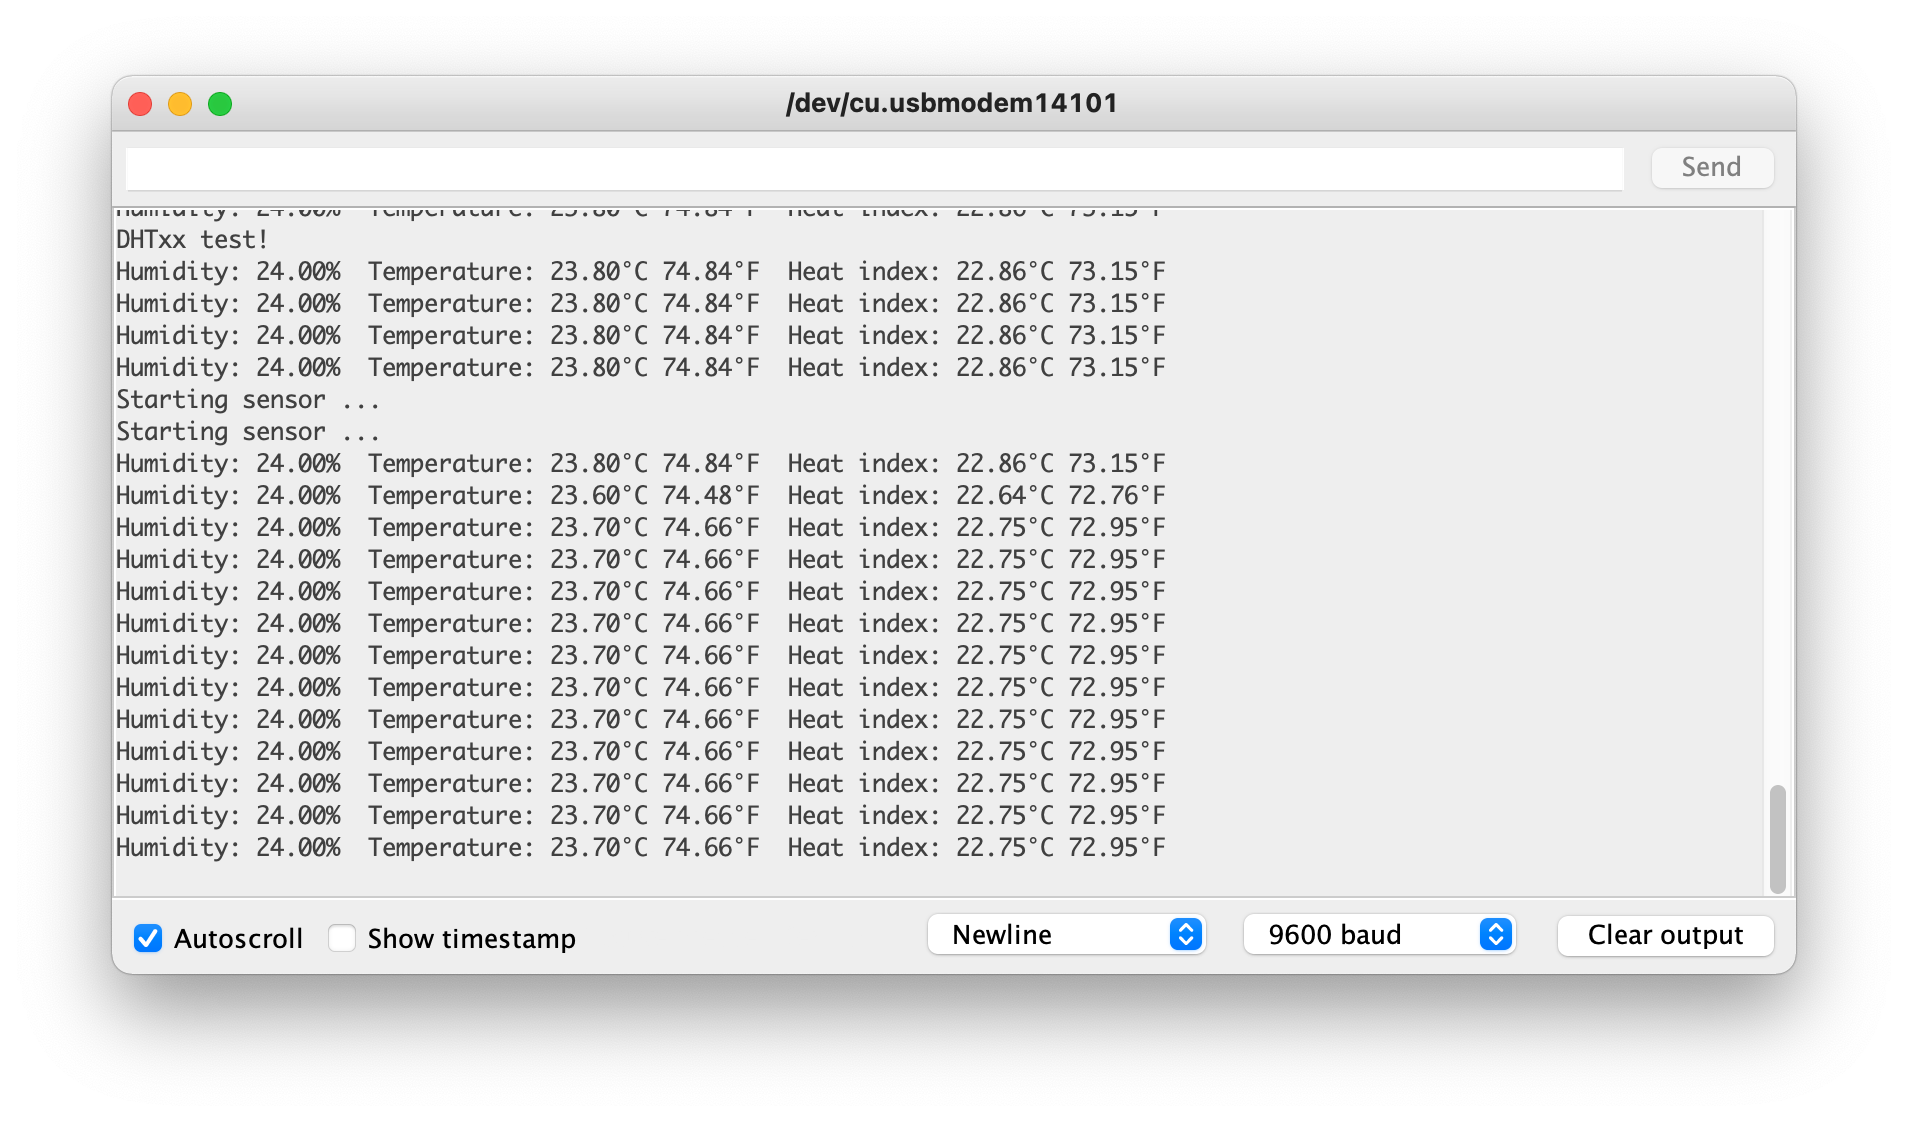
When you upload the code and go to the serial monitor you should see…

Your task
Can you create a device that displays the temperature and humidity on the LCD display?
Remix 3: Sunny or Cloudy 15xp
Can you add another sensor so that your device will also display whether it is sunny or cloudy (in addition to temperature and humidity)? Here are some pictures using previous hardware
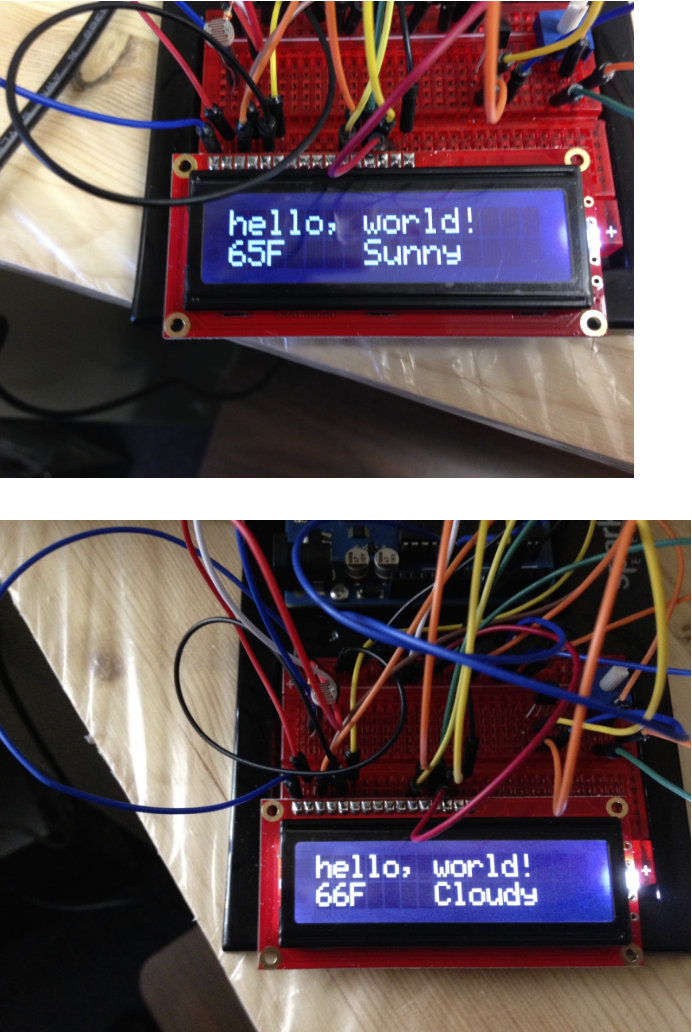
I don’t need to see the words hello world I want to see the temperature, humidy, and whether it is cloudy or sunny.